
Google Slides is one of my favourite G Suite tools. Its versatility and ease of use offers lots of amazing visual possibilities for students to present their learning in creative and interesting ways.
Here are 10 tips for becoming a Google Slides wizard…
10. Master your design with Master Slides
Did you know that you can make a single change in one place that then changes on every slide? Whether you want to add a graphic to every slide, reposition a textbox on every page, or change the font through your entire presentation, you can do it on the master and it will update on every slide. Click on Slide >Edit Master, then make your change to whatever type of slide you want changed. It’s like magic!

9. Voice Type your speaker notes
Typing is so 2019! So instead of typing all your speaker notes why not just talk to your computer and have the words magically appear in the notes section below the slide? No special microphone or training required, just select Tools > Voice Type Speaker Notes, allow your microphone, then click and start speaking. And if you like this idea, you can find Voice Typing in Google Docs as well! Boom!
8. Stay focused when you need to insert an image
There’s no need to leave Google Slides just to find a great image to add to your presentation. Just go to Insert > Image and you’ll find options to add an image from your computer, from the Web, from your Google Photos, from a URL, or even directly from your webcam! All without leaving your slides so you can stay focused on making a great presentation! As a bonus, if you insert an image from the web this way, it’s also copyright free!
What if you want an even bigger choice of images? There are several Add-ons for Google Slides that offer some stunningly beautiful high-res image collections, and many of them are free! Go to Add-ons > Get Add-ons and search for Unsplash Images. Or Pixabay Free Images. Or Adobe Stock images. There are lots to choose from, and having just the right image can really enhance your next presentation.
7. Add almost anything to a slide
Tucked away under the Insert menu is a treasure trove of options for objects you can add to your slides. As well as images, you can also add text boxes, audio, video, shapes, lines, charts, tables, diagrams and wordart. So get creative and add whatever you need to build a compelling presentation for your audience. Don’t overdo it though! Remember, when it comes to slide design, less is usually more!
And yes, you read that right! You can now insert an audio file directly into a Google Slide! So students can now add voice notes, annotations, music, sound effects, pronunciations, and more.
6. Explore better design
Want some creative ideas for the design of your presentation? Check out the Explore feature built into Slides! It uses the power of artificial intelligence to magically suggest ways to improve the look of your slides. After you add your words and images to a slide, go to Tools > Explore to open the side panel and browse the suggested designs! When you see one you like, just click to apply it to your slide, and you’re done. It’s that easy.

5. Publish to the Web
You can easily share your beautiful presentation by publishing it to the web. After you share your slides simply go to File > Publish to the Web and choose the settings you want for the published product. Share the URL and your slides will be visible through any web browser. What a great way to share your presentation with colleagues, parents or conference attendees. If you continue to make changes, the web version will automatically update so your published Slides always have the right content. And if you no longer need to share your slides, you can unpublish to remove them from view. You have complete control! It’s the cloud, baby!

4. Slides as Pages
Google Slides is a great presentation tool, but did you know it’s also an impressive desktop publishing tool! All you need to do is go to File > Page Setup and change the standard 16:9 slide format to whatever shape and size you’d like. Just choose Custom and enter your desired dimensions, such as 21cm x 29.7cm (aka A4). Then you can use all of the design tricks of Slides to create published documents like newsletters, posters, flyers, business cards, etc! In fact, you could even resize to the size of a mobile phone screen and create prototypes for app designs. So many possibilities! Using the File > Download As menu you can export directly to PDF if you’d like to print your finished product. This little trick of changing the page size probably makes Slides the most versatile tool in the whole Suite!

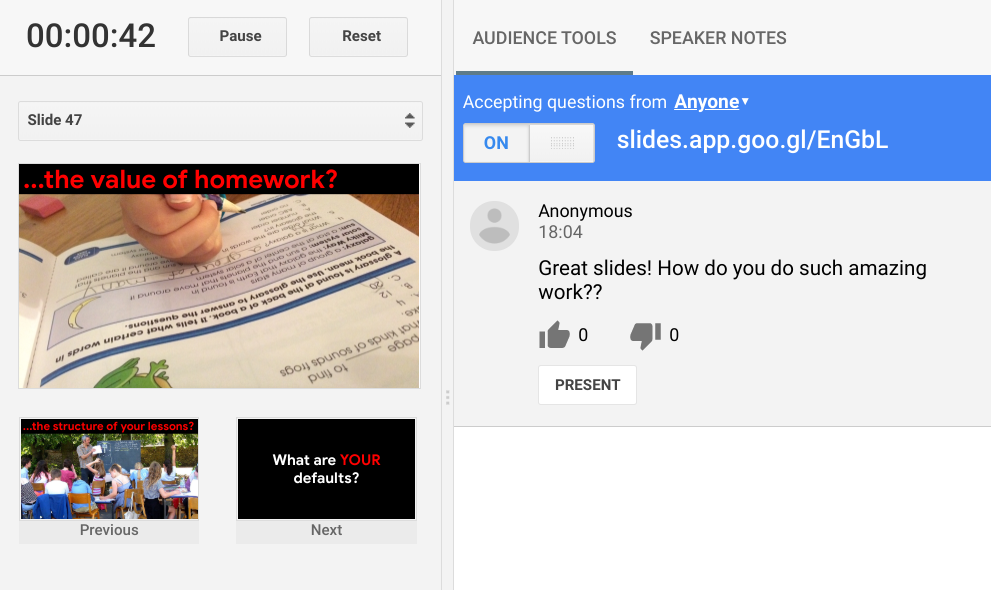
3. Questions and Answers
When the time finally comes to stand in front of an audience and present your slides, why not give the Q&A feature a go? After you hit the Present button to begin your presentation, click the Q&A button in the floating black toolbar at the bottom of the screen. Depending on how the projection is set up, you may need to rearrange the windows on the screens a bit, but once you turn on the feature, the audience will see a URL at the top of the presentation screen, which they can go to to ask questions or make comments as you present. Audience questions will appear on your screen so you can monitor their feedback, or even present one of their great questions to the whole group. What kind of sorcery is this!?
2. Closed captions while presenting
There’s a ton of research that supports the positive impact that closed captioning has on literacy simply by having the words appear on the screen as you speak. The same magic that allows Voice Typing can also add closed captions to your presentation, automatically as you present! Just click the CC button from the black toolbar when presenting and your words will flow along the bottom of the screen as you speak. You can even move the words to the top of the screen or change their size if you wish.

1. Collaboration is the real magic
Like all G Suite tools, the real magic happens when people can work together to share and build their ideas. Using Google Slides people can work together, on the same document at the same time, so work gets done faster, more easily and more collaboratively. Just click the yellow Share button, add your collaborators and then get busy together! Whether it’s a group project for a small group of students, a class project where everyone is able to contribute, or a staff presentation that requires input from multiple people, the collaboration feature of Google Slides will forever change the way you think about building presentations.
To learn more about Google Slides, check out the First Day of Slides series in the Google Teacher Centre. Or if you already feel pretty good about your ability to conjure up an impressive Slides presentation, why not show what you know and take the Google Educator Level 1 or 2 Certification.
![]() The Magic of Google Slides by Chris Betcher is licensed under a Creative Commons Attribution 4.0 International License.
The Magic of Google Slides by Chris Betcher is licensed under a Creative Commons Attribution 4.0 International License.