My Other Computer is a Data Centre

YouTube CubeOne of the most common questions I get asked by teachers is how to include video in their online resources. Whether it’s including video clips in Moodle or embedding a video into a wiki or blog, the use of video can be a powerful tool for helping students learn. As someone once said to me “Give me 3 minutes and the right piece of video, and I can teach you almost anything”.

Working with video has a reputation for being complicated. I remember doing an online video project about 13 years ago with a school in Japan and we were literally air-mailing VHS cassettes to each other each because it was the “simplest” way to get the job done. Indeed, it’s true that even just a few years ago, working with video was still relatively difficult… the file sizes are huge, the editing process can be complex, and storing video files for playback on the web has traditionally involved a bewildering array of codecs and other technical-sounding choices. It’s all too much for many people.

Tools like Moodle can handle the inclusion of video in a course. If you can edit your video and get it in the right format, Moodle will usually handle the storage playback for you. Or not. It can be a bit of a lucky dip, and it often requires a disproportionate amount of work that many teachers simply don’t have the time or skills to do.

Enter YouTube.  YouTube celebrates its 10th birthday this week, and it would be an understatement to say that it has totally changed the way that regular non-techie people publish video. Thanks to YouTube’s massive backend infrastructure, much of the hard work of uploading, hosting and sharing video online is no longer difficult. I heard recently that there is currently over 100 HOURS of video being uploaded to YouTube every minute, so the amount of content you have access to is truly mind boggling.The fact that so much content is being added to YouTube every minute of every day is testament to just how straightforward it is for “normal” people to manage.

Most people have used YouTube to watch videos. Whether it’s to learn something new by watching a TED Talk, or just to have a giggle at a cute cat video, YouTube has become a repository of just about any piece of video content you can imagine. The thing you should know is that YouTube lets you take just about any piece of video, in just about any format, and when you upload it, the YouTube servers do all the hard work of converting, transcoding, storing and publishing that clip.  That’s all the really hard stuff that for so long was the part that made working with video way too hard for many people. Now, if you can click the Upload button, you can publish a video to the world.

But did you know that there are a whole lot of other things that you can do on YouTube?

If you go to www.youtube.com/editor you will find a reasonably capable online video editor at your disposal. Sure, it’s not Premiere Pro or Final Cut, it’s not even iMovie, but for a completely free video editing tool that runs in nothing but your web browser, it’s surprisingly functional. Best of all, you have direct access to ANY video on YouTube marked with a Creative Commons license. And that means millions of videos, on just about any subject. While it’s a great thing for students to be able to capture their own footage, there is an awful lot of useful production you can do with access to the enormous library of YouTube videos without any need for a camera at all. Just search for what you want and drag it to the timeline, then use the trim bars to isolate just the part you want. Or click on the clip to get the scissors tool to split the clip at any point. Or click the magic wand tool to add all sorts of video effects, including image stabilization. Creating a video from the work of others is as simple as dragging the desired clips into place, trimming them down, getting them in the right order and even adding transitions, titles and music. It’s all right there on the webpage. Oh, and of course if you’ve uploaded clips to YouTube previously, you can edit your own videos as well.

For anyone who has been editing video for a while, this is jaw dropping stuff. While it’s a relatively simple editor right now, there’s little doubt that it will get better and better over time. Worth noting is that, because it’s using the massive resources of YouTube’s server farm, the computer you’re editing on does not have to be especially powerful. The servers are doing all the heavy lifting at the other end.

Once you finish editing, you can then publish your work back to YouTube and share it with the world. It’s just ridiculously easy.  Once your completed video is back on YouTube you can share it in all the usual ways, including embed code. This brings us back to where we began with this article, with the ability to easily grab the embed code and drop it into Moodle, a wiki or blog, or any website that accepts embed code (and really, these days, that’s just about all of them)

So now you have a video that sits nicely on your blog, wiki or learning management system, powered by the resources of YouTube

What’s the bottom line?

If you want to use video in your teaching resources (and you should be!) then make sure you check out the creative options that YouTube offers. It’s more than just cute cats.
Philly to Sydney with Year 2

If you like, you can skip right to the bottom of this post and just watch the video, but I always find the story behind the story kind of interesting. So I thought you  might like to know a little bit about how and why this video was made.

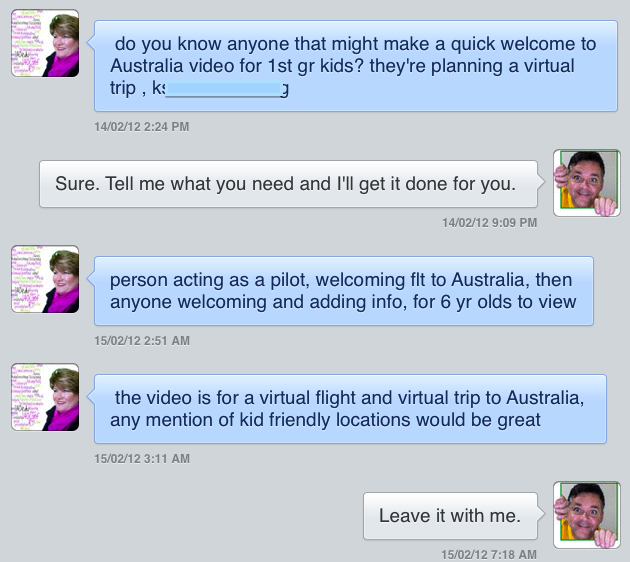
It started out with a simple tweet from my buddy Kim Sivick in Philadelphia.  It started a conversation that went something like this…

Do I know anyone who might make a quick Welcome to Australia video?
I sure do.

And besides, I owe Kim a favour. When I was running blogging workshops with our staff last year I was hoping to tap into the experiences of some very blog-savvy educators by getting them to Skype in and talk to our teachers about the realities and the practicalities of using blogs in the classroom. When I asked for volunteers on Twitter (where else?) Kim Sivick  was one of those who generously responded and agreed to spend time talking with us to share her expertise.

I also got to meet Kim in person at ISTE in Philadelphia last year too, so it was nice to “close the loop” on our virtual meetups.

Kim’s idea was deceptively simple. Get our kids to make a short video about a virtual trip to Australia, and in return her classes would make a video about a virtual trip to Philly for us.

With virtually zero planning, I dropped into one of our Year 2 classrooms and asked the teacher there, Lisa, if her kids would like to make a video for these students in Philly and she jumped at the chance. In no time, Lisa and I had a bit of  a brainstorm on what sorts of things we might do, and she started working with the kids to write a script using GoogleDocs. The script gradually evolved and took shape over the next few days.

I’d been wanting to do some work with chromakeying, or greenscreening for a while, but had just never gotten around to it. It wasn’t something I’d done before, but I suggested to Lisa that if we shot the video of the kids in front of a greenscreen, then it might be fun later to try and drop in the images of various parts of Australia as backgrounds. She thought that sounded pretty cool, so I went to our IT Director and asked if I could buy an inexpensive greenscreen kit. It was one of those things we’d talked about buying for a while, but never quite got around to it. With a reason to need it now, we went online and ordered it on the spot.

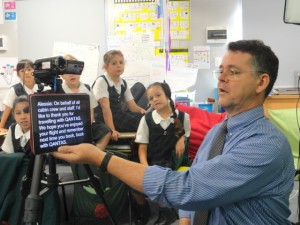
When it eventually arrived we set up a date for the shoot. The classroom was transformed into a studio for the morning with lights, camera, and plenty of action. I used iPrompt Pro on my iPad to transfer the script, and then held it up just under the camera lens as a  scrolling teleprompter so the kids could read the script as naturally as possible. We shot it on a Sony HiDef camcorder at 1080i/50. It took a few takes to get things right, but the kids really worked hard to do it was well as possible. Being able to repeat a section over and over in order to get it right was a valuable part of the learning experience.  When it came time to shoot, we all had fun calling out things like “Quiet on the set!” and “Rolling!”  and “Action!”, and running things just like a real movie set. I think the kids had a lot of fun recording it.

I took the footage back to my desk and dumped it all onto my MacBook Pro to ponder out the best way to edit it.  Although I definitely do want to get the kids doing more video work themselves, getting them to edit the footage was not really the learning goal for this particular exercise… it was all about their performance for the camera. After some experiments with iMovie I eventually decided that I’d cut it together with Premiere Pro instead. Premiere Pro was certainly not a program that I knew well, but this seemed like a great chance to get cosy with it. I’m glad I did… it’s a very impressive NLVE tool and I like it a lot more than Final Cut Pro 7.

I always try to make sure we set a good example for students regarding copyright, so it was important that all the background images were available under a Creative Commons licence. I think it’s really important that we demonstrate to our students that you can actually make worthwhile digital media without continually breaking copyright law. All the background images are CC licensed, as are the two pieces of music that I included, both from jamendo.com. The two videos were not released under CC, but using their YouTube contact address I wrote to the owners of both and both were more than happy for us to use their clip. One even offered to send us the hi-def footage! Most people are pretty generous if you just ask. Remember, Copyright doesn’t mean “you can’t use it”, it just means “you can’t use it without permission”, so if it’s not CC, then do the right thing and get permission! It’s just not that hard. (Publishing works under a Creative Commons license makes it much easier of course because it’s essentially an “up-front” permission which is pre-granted as long as you stick to the uses stipulated by the copyright owner)

After a couple of days of editing over the weekend, I did the final render to a 720p .m4v file and uploaded it to YouTube as a private link so the Philly kids (and our kids) could see it the next day.  Here’s the finished product…

http://www.youtube.com/watch?v=WYPHlWtQ-uw

It always nice to ceremonialise things that are a bit special, so we set a date for a premiere screening and invited all the Year 2 mums and dads in to watch. When the Year 1 Philadelphia kids watched it, they all wore Aussie bush hats and set up their classroom like the inside of a plane to watch the video.  We had our screening this morning and the movie played to a packed classroom of excited Year 2 students and their parents. Proud parents. Excited kids. Performing for a real audience. Making opportunities to create and practice and iterate. Immediate feedback. And lots of fun and laughs. An authentic learning experience?  You better believe it..

Kim tells me that her kids are working on the sequel for us, showing us their virtual trip to Philadelphia, so we are looking forward to that.

Lisa, our Year 2 teacher, now keeps asking me when we can do our next global project, and is coming up with lots of cool ideas for how it will fit into next terms syllabus.

Overall, I think I’d consider this whole thing a win, wouldn’t you. 🙂

Is the live lecture dead?

There was an interesting article in The Age newspaper the other day titled Teachers Online eLearning Mocking Fears, which was basically about some tensions being felt at some Australian universities between students who were asking (or demanding) that lectures be recorded and placed online, versus lecturers who were resisting this idea because they feared that students would capture, remix and republish their mistakes using social media.  The lecturers in question did not want their “mistakes” being made public to the world.  You can read the whole article for yourself.

But to me, it begs the following line of reasoning…

IF
the nature of a “lecture” is simply the delivery of information…
AND
the students want to be able to watch a recording of the “lecture” at their leisure…
AND
lecturers are concerned about producing a “perfect”, mistake-free lecture…
THEN
why don’t lecturers just create a prerecorded version of the lecture, without mistakes or gaffes, cleanly edited to their satisfaction…
AND
just publish it online for students to watch…
BUT
if they can reduce their lectures to a recording…
THEN
why have the lecture in the first place?…
IF
all students need is the prerecorded content?…
THEN
does this mean lecturers can lecture effectively using prerecorded video?
AND, IF SO,
can learning (at least via a lecture style presentation) be reduced to something as simple as “watching television”?

I learn a lot by watching video, and I think it’s a great way to develop understanding of Just-In-Time key concepts. I’ve no doubt that video podcasts, documentaries, YouTube clips, etc, are a great way to learn.  But you have to ask the question… If a recording of a lecture is as good as going to the lecture, then why have the actual lecture? Are concepts like iTunes U, or TED Talks, or the Kahn Academy, or even YouTube, far more potent than we give them credit for?

Or perhaps it’s a case that any lesson that can be effectively summed up in a recorded video, should be….